Trim Transparent Margins or Resize? Fix a Product That Looks Too Small
Updated November 6, 2026
Direct answer: If the product already contains the detail you want and only appears too small because of empty canvas, remove the unwanted transparent bounds and add deliberate padding. Trimming changes the canvas, not the product’s pixel dimensions. Resizing changes the raster but does not restore missing product detail. Keep any intended shadow inside the final bounds; if trimming clips it, stop and adjust the crop.
Start with an alpha and viewer check
First, confirm whether the empty area is genuinely transparent. A checkerboard shown by a transparent viewer is a display convention, not a background baked into the image. Treating that checkerboard as a solid background could lead you to trim or clean pixels that should remain transparent.
Also separate two jobs: cleaning the product’s alpha edge and changing the canvas bounds. Review any alpha-edge cleanup on its own before trimming, because it can affect where the visible content ends. Once the edges are acceptable, use Photoshop’s Image > Trim options. They include Transparent pixels, Top left pixel color, and Bottom right pixel color, with edges available for selection.
Use transparent-pixel trimming when the margins really are transparent. Color-based trimming depends on correctly identifying the background. If that classification is wrong, it can remove wanted product content or shadow.
Crop, resize, or build a new composition
A crop decides which part of the existing canvas to keep. A trim removes bounds according to transparency or sampled color. A resize changes the pixel dimensions of the image. Creating a new scene is a composition choice: it can establish a new canvas and place the existing product without pretending that the product has gained detail.
| Approach | Final canvas | Product pixels | Canvas width | Result |
|---|---|---|---|---|
| Leave unchanged | 1000 × 1000 | 300 × 300 | 30% | Large transparent margin remains. |
| Tight manual crop to subject bounds | 300 × 300 | 300 × 300 | 100% | Canvas changes, but the shadow may be clipped. |
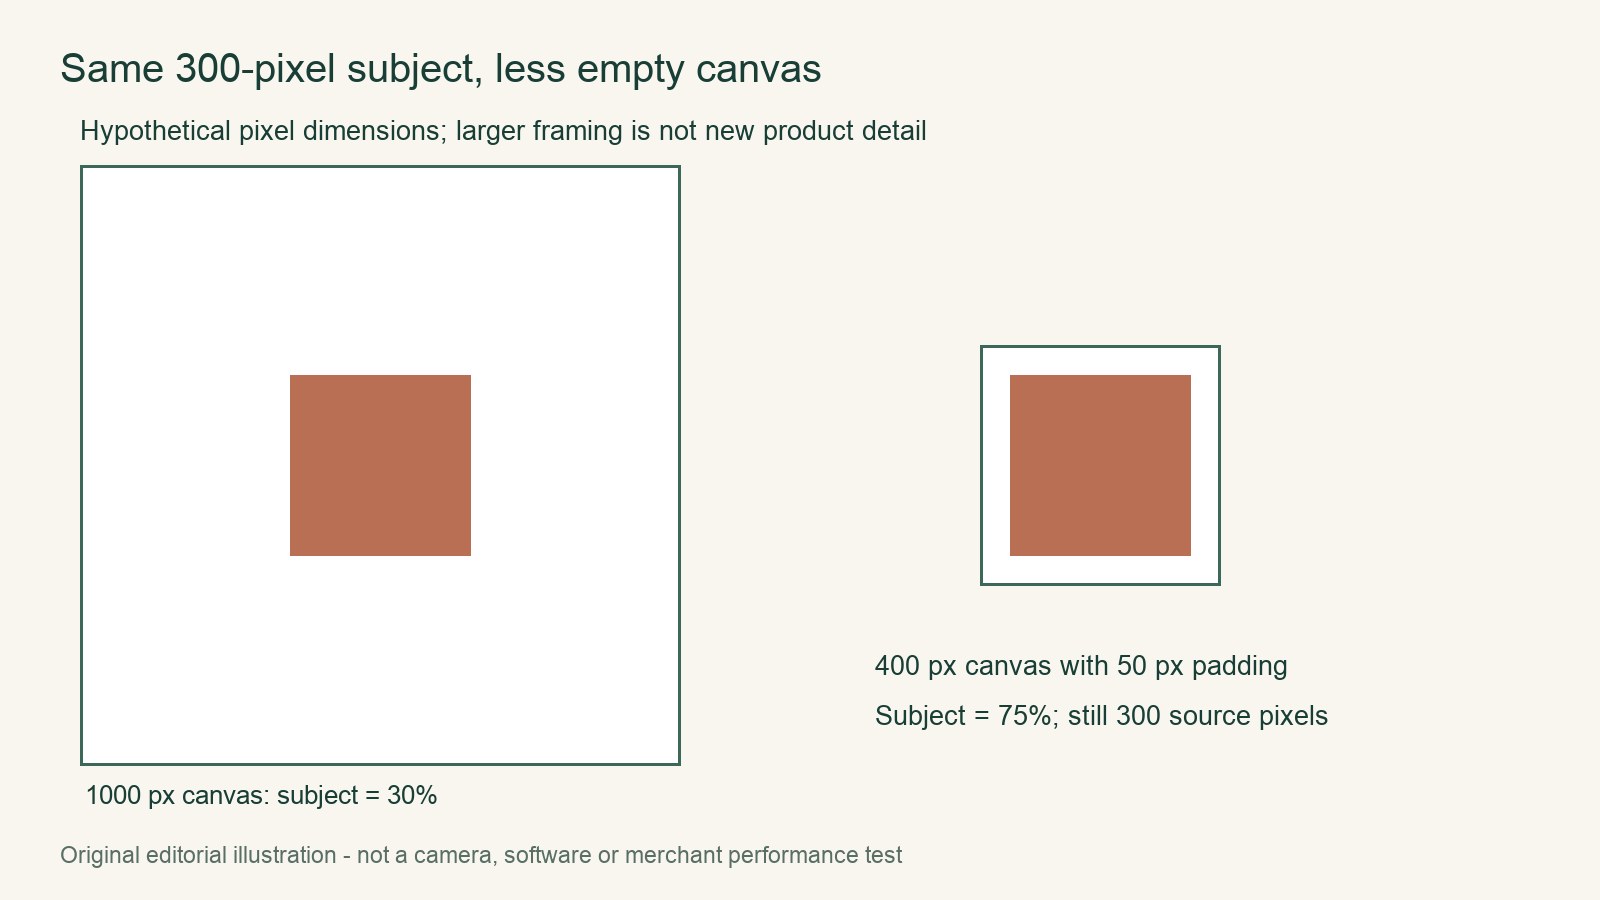
| Trim, then add 50 px per side | 400 × 400 | 300 × 300 | 75% | Intentional padding makes the product appear larger in the frame. |
| Resize the whole image to 400 × 400 | 400 × 400 | 120 × 120 | 30% | The raster is resampled and the product retains the same relative share. |
| Compose a 400 × 400 scene | 400 × 400 | 300 × 300 | 75% | Placement is deliberate; no product detail is added. |
Worked example: trimming then adding padding
Imagine a 1000 × 1000 transparent canvas containing a 300 × 300 product. The product occupies 30% of the canvas width. This is an editorial illustration, not an executed Photoshop app test.
Assuming all wanted content fits inside the 300 × 300 subject area, trim the empty transparent margin. The canvas becomes 300 × 300. Add 50 pixels on each side, producing a 400 × 400 canvas:
300 + 50 + 50 = 400 pixels
The product remains 300 × 300 pixels, so it now occupies:
300 ÷ 400 = 75% of the canvas width
This operation changes the amount of surrounding space rather than enlarging the product itself. The product remains 300 pixels wide until any later resampling. The resulting 75% share is an intentional choice for this example, not a universal marketplace fill percentage.
Trim around the shadow, not just the visible product
Before trimming, inspect every edge of the product and any shadow you intend to keep. If the shadow extends beyond the visible product, it must be included in the retained bounds. A perfectly tight trim around the product can still be the wrong edit when a softer shadow needs room to remain intact.
Transparent-pixel trimming retains nontransparent shadow pixels, so a real shadow can make the retained bounds larger than the product itself. A tight manual crop or color-based trim can still remove wanted content. Undo such a crop if it cuts the shadow, then retain wider bounds or use the transparent-pixel option when appropriate. The numerical example assumes all wanted content fits within its stated 300 × 300 area.
For the worked example, adding 50 pixels of padding after establishing safe bounds gives a controlled result: the product stays 300 × 300, the canvas becomes 400 × 400, and the final shadow has room if that padding has been allocated around it.
Export and verify the final result
- Complete and review the alpha-edge cleanup before trimming.
- Trim only the empty margins, selecting edges carefully around the product and its intended shadow.
- Add the chosen padding and confirm the product’s position and proportion.
- Export the final composition.
- Inspect the exported file for clean edges, an intact shadow, intended transparency, and the expected product-to-canvas ratio.
If the exported product looks too small, decide whether the problem is excess canvas or insufficient product pixels. Remove empty canvas when the detail is already right; resample only when you accept a change to the raster dimensions. Never trade a clipped shadow or missing edge for a larger-looking frame.
Continue with the next task
- Product photography and editing resources
- Fashion and model workflow resources
- Diagnose a white fringe on a transparent logo
Sources and scope
Documentation checked November 6, 2026. Rewarx is the publisher. Covers are MiniMax-generated editorial concepts, not measured products or outputs of the tool discussed. Native diagrams and worked examples are labeled illustrations. No customer conversion result, physical product test, live marketplace transaction or hands-on provider benchmark is claimed.