White Halo on a Transparent Logo: Diagnose the Edge, Not the File
Updated November 5, 2026
Direct answer: A white halo is usually an edge-color or transparency problem, not proof that the logo file itself is “bad.” Inspect the same pixels over white, charcoal, and mid-tone backgrounds. A faint rim that changes with the backdrop suggests partially transparent edge pixels or an unwanted white fringe. A solid white block that remains visible on dark backgrounds is a different issue. Start with the original vector or master artwork, make only small reviewed corrections, and avoid deleting every white pixel or shrinking every edge.
1. Inspect the logo on three backgrounds
Place or preview the logo against a white background, a charcoal background, and a mid-tone background. Keep the logo’s position and scale unchanged so you can compare the same boundary in each view.
- White background: Useful for seeing whether a pale halo blends into the background or disappears.
- Charcoal background: Exposes light fringes, white boxes, and pale edge pixels that may be hidden on white.
- Mid-tone background: Shows whether an edge still reads as a separate color rather than belonging naturally to the logo.
Look at both the interior and the outside of the outline. Pay particular attention to a thin light band that follows the contour but does not correspond to any intentional part of the design.
2. Distinguish four different results
| What you see | Likely interpretation | Next action |
|---|---|---|
| White remains white and follows the intended logo shape on every background. | A true white, opaque part of the logo. | Preserve it. Do not remove it with a broad white-pixel deletion. |
| A solid white rectangular or block-shaped area remains visible on charcoal and mid-tone. | An opaque white box or background that was not removed. | Remove only the confirmed background area while preserving intentional white details. |
| A pale rim is faint on white, obvious on charcoal, and changes tone with the background. | Pale, partially transparent edge pixels or a light edge fringe. | Target the affected edge with reviewed, localized cleanup. |
| Checkerboard squares or a square pattern remain embedded in the visible artwork. | Viewer-style checkerboard colors baked into RGB rather than genuine transparency. | Return to the removal workflow or original master instead of treating the pattern as transparency. |
3. Use a simple color calculation to identify partial transparency
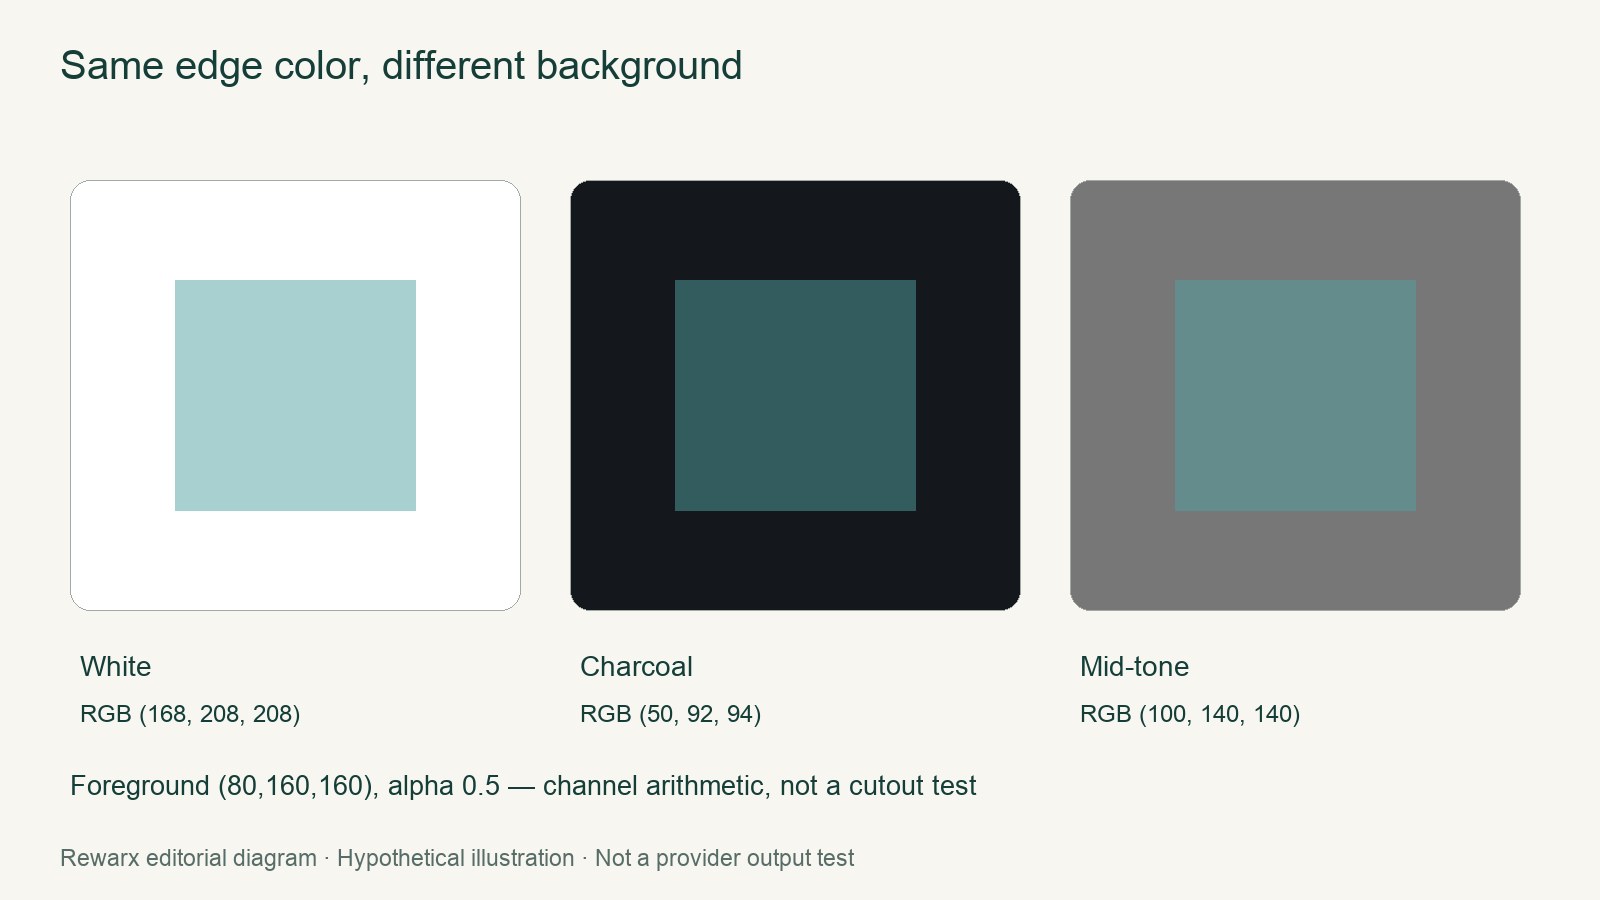
Consider foreground RGB (80, 160, 160) with alpha 0.5. Over black, the resulting visible color is approximately (40, 80, 80). Over white, it is approximately (168, 208, 208). These results come from simple channel arithmetic, not from an app test.
The example shows why an edge can look different on different backgrounds. If the logo’s pixels contain pale colors but only partial alpha, their contribution changes with the backdrop. That behavior is consistent with a semi-transparent fringe, although the three-background inspection is still needed to distinguish it from an intentional design feature.
4. Follow a staged cleanup workflow
- Find the best source. Prefer the original vector or master file. Re-exporting from that source is preferable to repeatedly altering an already damaged transparent PNG.
- Confirm the problem in the pixels. Inspect the alpha channel and RGB colors around the suspected edge. Determine whether the area is opaque, partially transparent, or carrying visible checkerboard colors.
- Clean the edge in small selections. Photoshop documents Layer > Matting > Defringe as a way to reduce fringe. Use it only where the unwanted light edge has been identified, then review the result on all three backgrounds.
- Remove confirmed white areas selectively. Erase a white box only when you have established that it is background. Do not erase all white pixels: the logo itself may contain white shapes, counters, lettering, or highlights.
- Protect the silhouette. Do not shrink every edge simply to hide the halo. Edge reduction can change proportions, spacing, and recognizable details even when the visible fringe improves.
- Export and recheck. Produce a transparent PNG and repeat the white, charcoal, and mid-tone inspection before using it.
5. Handle Canva carefully, then set clear stop conditions
If Canva is part of the workflow, remember that background removal and transparent download are separate steps. Complete the background-removal step, then obtain the transparent download. Check the eligibility of the required format and the current paid plan before relying on that output; do not assume that background removal automatically produces a transparent PNG.
Stop the cleanup process when further deletion begins removing intentional white, when edge cleanup alters the logo’s appearance, or when a correction fixes one background but creates a new rim on another. If you cannot confidently separate the true white logo from an opaque white box, return to the original master rather than guessing.
Before delivery, save the reviewed source and exported PNG separately. Your practical final check is simple: the intended white parts should remain white, the background should be genuinely transparent, no checkerboard pattern should remain in RGB, and the logo should look stable when viewed over all three backgrounds.
Continue with the next task
- Product photography and editing resources
- Fashion and model workflow resources
- Choose a local repair method
- Control an editing revision
Sources and scope
Sources checked November 5, 2026. Rewarx is the publisher. New covers are MiniMax-generated concept illustrations, not outputs of the reviewed tool, measured specimens, or proof of product accuracy. Use the labeled body diagrams for numerical examples. Worked examples and diagrams are labeled editorial illustrations; no merchant conversion result or hands-on provider benchmark is claimed.