T-Shirt Mockup Print Scale: One Artwork Size Across Different Shirts
Updated November 5, 2026
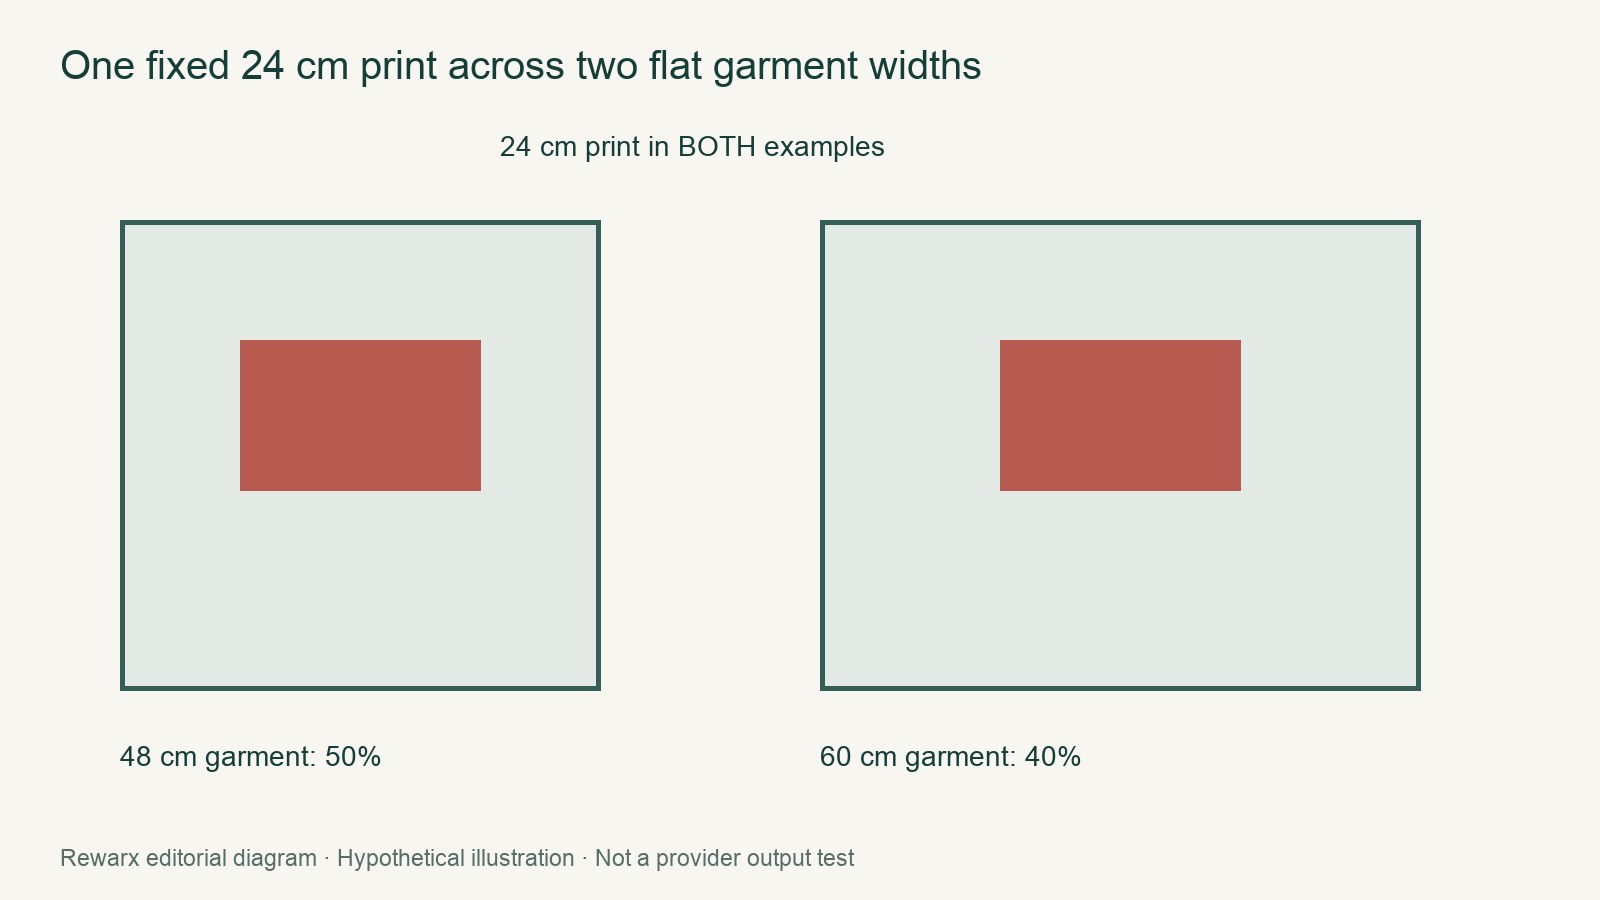
Direct answer: Treat one artwork as one physical print size across two garment widths unless the applicable provider rules say it will be downscaled. If the same 24 cm-wide artwork is placed on a 48 cm-wide flat garment, it occupies 50% of the visible width. On a 60 cm-wide garment, it occupies 40%. Those hypothetical proportions illustrate mockup scaling; they do not predict fit. Confirm the final printed size using the applicable Product File guidelines rather than a perspective photograph.
1. Separate print dimensions from mockup proportions
Mockup scale describes how wide an artwork appears relative to the garment. It does not automatically change the artwork’s physical dimensions. For example:
| Visible flat garment width | Artwork finished width | Width calculation | Illustrated proportion |
|---|---|---|---|
| 48 cm | 24 cm | 24 ÷ 48 | 50% |
| 60 cm | 24 cm | 24 ÷ 60 | 40% |
The artwork is intentionally larger relative to the narrower shirt. That is a consequence of holding the physical artwork width constant while changing the garment width. The example is not a real-fit prediction, and it does not establish that the same print area applies to every shirt.
2. Walk through the two sizes consistently
Begin both mockups with the same source artwork and the same intended finished print width. For the first size, place the 24 cm artwork within the 48 cm visible flat garment width, producing the illustrated 50% relationship. For the second, use the identical artwork on the 60 cm width, producing 40%.
Keep the measurement origins unchanged between the two mockups:
- For horizontal placement, measure from the left edge of the visible flat garment to the left edge of the artwork.
- For vertical placement below the collar, measure from the same collar reference to the top edge of the artwork.
- Record the artwork’s finished width separately from its source-file dimensions.
Do not estimate physical artwork dimensions from a perspective model photograph. Perspective changes apparent proportions, so the image may look narrower or wider than the same artwork on a flat garment. Use flat measurements and a provider template for dimensional decisions.
3. When vendor downscaling is different
Printful says designs generally stay the same physical dimensions across garment sizes, with documented smaller-size downscaling exceptions. Therefore, a mockup based on one unchanged 24 cm width may be correct in principle, but the applicable Product File guidelines control the actual result.
Printful provides this example: a 10-inch design width multiplied by 11.5/15 equals about 7.7 inches for an applicable smaller print area. This illustrates how a smaller area can produce a smaller finished width. It is not a rule that can be applied to every shirt or size without checking the relevant guidelines.
When a smaller-size exception applies, distinguish the source artwork from the final output. The source file can remain unchanged while the provider reduces the finished print. The mockup should represent that documented final width only after the reduction has been identified.
4. Distinguish downscaling from choosing a larger design
| Goal | What changes | What the mockup should communicate |
|---|---|---|
| Use one artwork size across sizes | Garment width changes; intended finished print width stays constant unless an exception applies | The same print occupies a smaller percentage of the wider garment |
| Apply a documented smaller-size reduction | The provider reduces the applicable finished print | The smaller garment shows the reduced finished width |
| Choose a deliberately larger design | The intended finished artwork width is increased before placement | A visibly wider artwork across the garments, subject to the applicable template |
Vendor downscaling is a rules-based reduction on an applicable smaller print area. Choosing a larger design is an intentional change to the artwork dimensions. One should not be used to explain the other.
5. Practical review and next steps
- Check the Product File guidelines for each exact garment style and size involved.
- Decide whether the goal is a constant finished width, a documented downscaled width, or a deliberately larger print.
- Prepare two flat plans using the same artwork, measurement origins, and collar-relative placement reference.
- Calculate each mockup proportion from finished artwork width divided by visible flat garment width.
- Keep garment flat width, chest circumference, source artwork width, and finished print width as separate recorded values.
The safest workflow is therefore: flat measurement first, provider rule second, mockup proportion third. This keeps a proportional illustration from being mistaken for a guarantee about the final physical print or its fit.
Continue with the next task
Sources and scope
Sources checked November 5, 2026. Rewarx is the publisher. New covers are MiniMax-generated concept illustrations, not outputs of the reviewed tool, measured specimens, or proof of product accuracy. Use the labeled body diagrams for numerical examples. Worked examples and diagrams are labeled editorial illustrations; no merchant conversion result or hands-on provider benchmark is claimed.