Outpainting vs Cropping Printable Wall Art: Ratio, Content and Pixels
Updated November 5, 2026
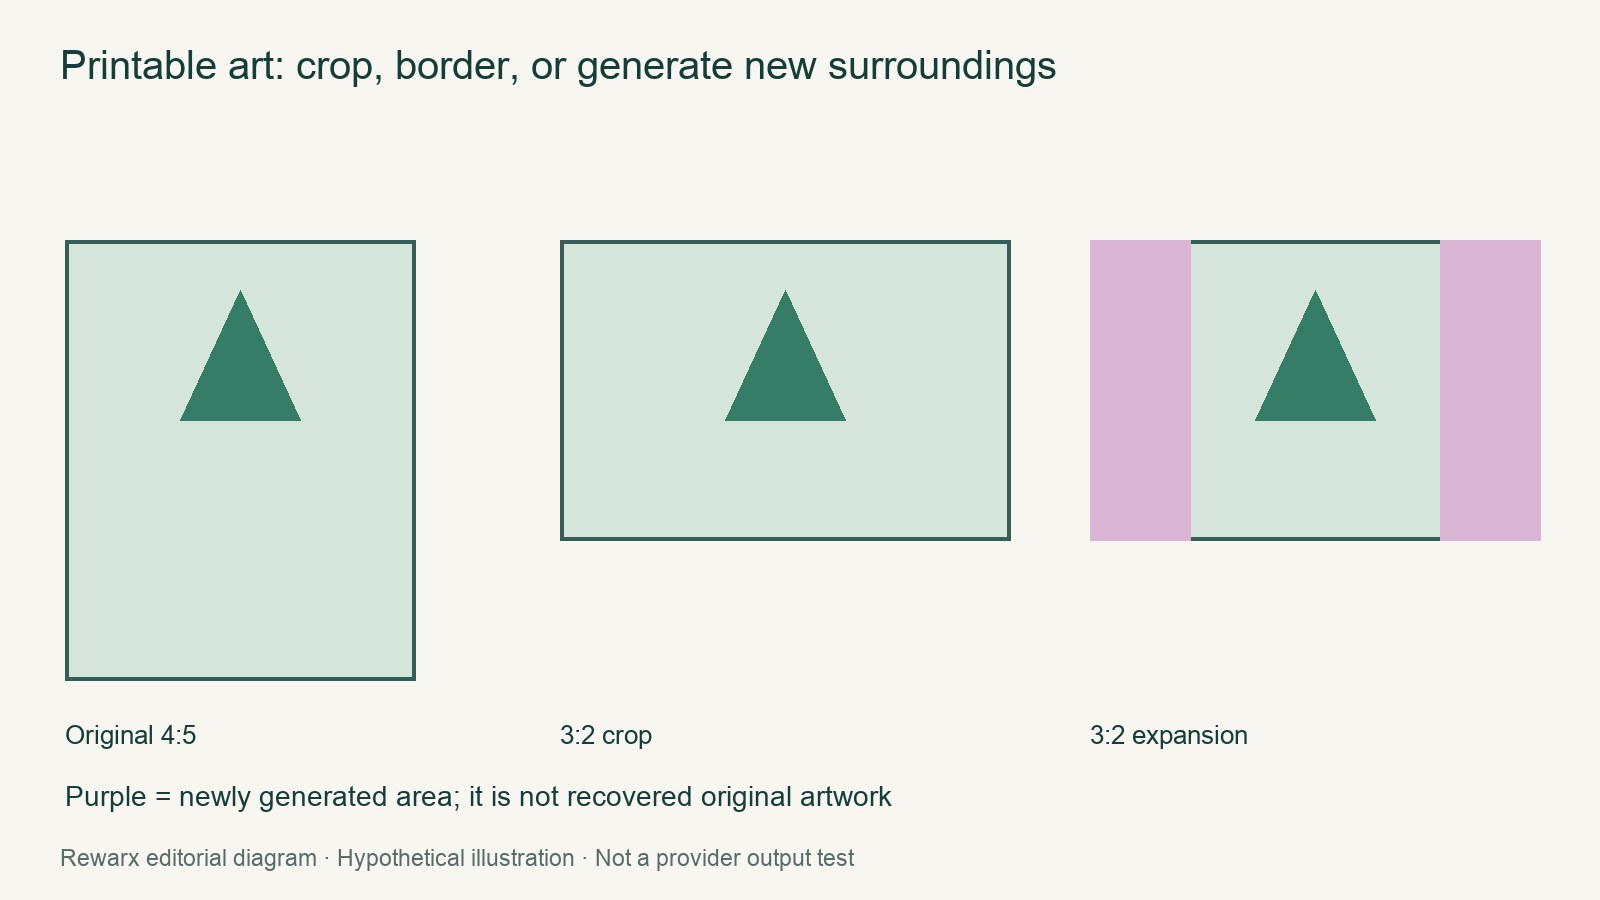
Direct answer: For the 4000 × 5000 px, 4:5 portrait original, a 3:2 landscape requires a clear trade-off. Keeping the full 5000 px height produces a 7500 px width, so 3500 px of side space must be added or covered. Keeping the full 4000 px width produces a height of about 2667 px, removing roughly 2333 px from the top and bottom. Use a border to preserve the original composition, expansion when generated side regions suit the artwork, or cropping when losing the top and bottom is acceptable. These are arithmetic illustrations, not an Adobe output test or a print-quality guarantee.
Start with the ratio arithmetic
This example calls for a 3:2 landscape treatment. A 3:2 canvas is 1.5 times as wide as it is tall, while the original 4000 × 5000 px file is a 4:5 portrait. That difference determines the available options:
| Method | Illustrative pixel result | Content consequence | Best suited when |
|---|---|---|---|
| Generative expansion | 7500 × 5000 px | Preserves the full height while generating 3500 px of additional side area. An even split would be 1750 px per side. | New landscape scenery is acceptable and has been reviewed carefully. |
| Cropping | About 4000 × 2667 px | Preserves the original width but removes about 2333 px of vertical content in total. | The top and bottom can be lost without changing the composition’s essential message. |
| Border presentation | Outer canvas may be 7500 × 5000 px while the artwork remains 4000 × 5000 px | Preserves every original artwork pixel; the added area becomes presentation rather than generated scenery. | The original composition must remain intact. |
| Upscaling | Depends on the requested output size | Addresses pixel dimensions but does not resolve the crop-versus-expansion decision. | The composition and canvas treatment have already been chosen. |
Choose by content, not by ratio alone
Adobe Firefly documents generative expansion and preset aspect ratios. Its expansion process creates new regions outside the original image; it does not recover original artwork that was not present in the source file. Any side scenery produced through expansion should therefore be described as generated, not as a recovered part of the artist’s composition.
Cropping makes the opposite trade-off: it keeps existing pixels but permanently omits content from the delivered frame. Expansion keeps the full height but introduces generated material. A border retains the artwork while changing how it is presented. Upscaling, cropping and expansion solve different problems, so upscaling should not be treated as a solution to missing top, bottom or side content.
Inspect expansion edges before accepting them
Review the joins and the full width of any expanded side regions. Look specifically for repeated motifs, obvious seams, text-like marks and false signatures. A generated detail that looks like an artist’s signature can create ambiguity about what the original work contains and whether the alteration reflects the artist’s intent.
Expansion is most appropriate when the concept allows for newly imagined surroundings. If the source has a tightly controlled composition, a border is a cleaner way to move from portrait to landscape without inventing a continuation.
Protect the source rights and composition
Check the source licence, commission terms or other permissions for modification and the intended commercial use. If an agreement requires the original composition to remain intact, do not silently crop or expand it. Record the permitted alterations and keep the source agreement with the production records.
Retain the untouched 4000 × 5000 px master. Save each derivative as a separate file and label its treatment clearly. This preserves the ability to return to the original composition if a generated version is rejected, while also preventing an edited file from being mistaken for the source master.
A framed preview is not the delivered-art specification
A framed preview shows how the artwork may look in that particular presentation. It does not establish the exact dimensions of the delivered image, whether border pixels are included in the file, or whether a frame and mat are supplied unless those details are explicitly confirmed.
Request the actual artwork file and ask for its exact width and height. Confirm whether the delivered image is the original, a cropped version, an expanded version or a bordered version. Keep the framed preview as a presentation reference, not as proof of the production specification.
Practical next steps
- Decide what cannot change: the full composition, the full height, or the absence of generated scenery.
- Use a border if preserving every original pixel matters most. Use cropping if the vertical loss is acceptable. Use expansion only after reviewing the generated edges.
- Keep the original master at 4000 × 5000 px and save any approved derivative separately.
- List only sizes actually supplied. Do not list 7500 × 5000 px or 4000 × 2667 px as delivered merely because one is the arithmetic target.
- Label added expansion regions as generated and describe any border as a presentation change.
- Confirm the actual delivered artwork, exact dimensions and included elements before describing the product. Pixel arithmetic alone does not establish print quality.
Continue with the next task
- Product photography and editing resources
- Fashion and model workflow resources
- Choose a local repair method
- Control an editing revision
Sources and scope
Sources checked November 5, 2026. Rewarx is the publisher. New covers are MiniMax-generated concept illustrations, not outputs of the reviewed tool, measured specimens, or proof of product accuracy. Use the labeled body diagrams for numerical examples. Worked examples and diagrams are labeled editorial illustrations; no merchant conversion result or hands-on provider benchmark is claimed.